Hello All! I created this craft site because I take on a lot of crafting projects, and occasionally I have friends who ask me for the directions or links to the stuff I’ve made. So this site really just serves the purpose to allow anyone to find the information to make the projects I’m attempting or have attempted.
For my first post I just thought I would add a few projects I’ve worked on in the last year or so. These won’t be as detailed as future posts as I didn’t really take step-by-step photos or document the process.
I made this airplane blanket for one of my best friends who just had her first son.


The concept here is simple. I traced out the shape of the plane, cut it out piece by piece and then sewed it on to the background fabric. For this blanket I used Cozy Flannel Navy Blue fabric for the blanket part and Cozy Flannel that has a white background and blue stars for the plane. After sewing on the plane I went around each piece with a zig-zag stitch to make it look fancier. Additionally, I created a border about an inch or two inside the edge of the blanket with a zig-zag stitch as well this is for looks as well as for hiding the edge of the blanket (which you would fold over and sew down). And that’s it! She say’s the blanket is great for tummy time because it’s soft and gives padding between the floor and her son’s head! 🙂
Here’s a tutorial that is very similar to this blanket:
http://badskirt.blogspot.com/2009/10/airplane-block-tutorial.html
————————————————–
I’ve also dabbled a little bit in making baby items. These are a few of the ones that are just lying around my house right now.


These are pretty simple. I just bought some white onesies and some cute fabric, cut the onesies in half, turned them inside out, and sewed in the fabric. For the one on the left I then attached some tulle to the bottom of the skirt. Simple and cute!
————————————————–

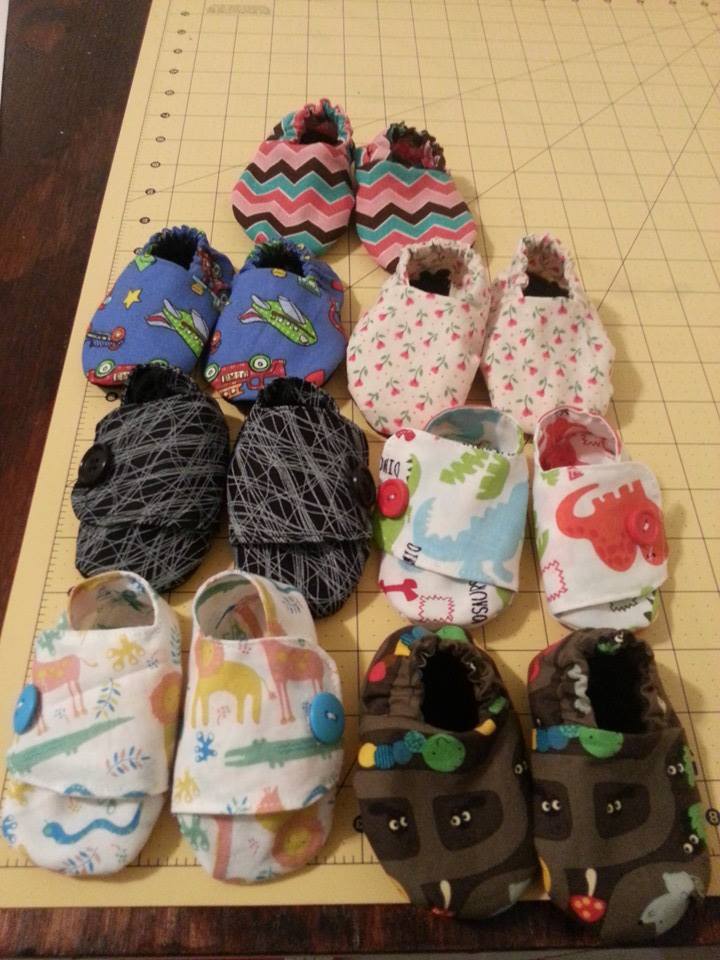
Here are some baby shoes I made. Fairly simple. Here’s a tutorial:
http://www.maked.ca/shoetutorial.pdf
————————————————–
Here are a few of the wreaths I’ve made:


These are all pretty straight forward. The Easter wreath is just ribbon, foam balls dipped in paint, and a hay wreath. The Fourth of July wreath is just a foam wreath wrapped in red, white, and blue, glitter tulle. The Halloween wreath is just my own concoction a mixture of some tulle, ribbon, a table decoration, and some glitter flower arrangement stuff. Simple stuff right there.
Here’s a tutorial for the Easter wreath:
http://www.positivelysplendid.com/2012/03/spring-wreath-tutorial.html
————————————————–
Last summer I made an apron that I’ve never actually wore for baking or cooking. LOL It just chills in my kitchen looking all cute.

I didn’t use a tutorial for this one. 😦
Maybe in the future I can make another one so I can work through all the steps again.
————————————————–
I made this bag after seeing it on Pinterest
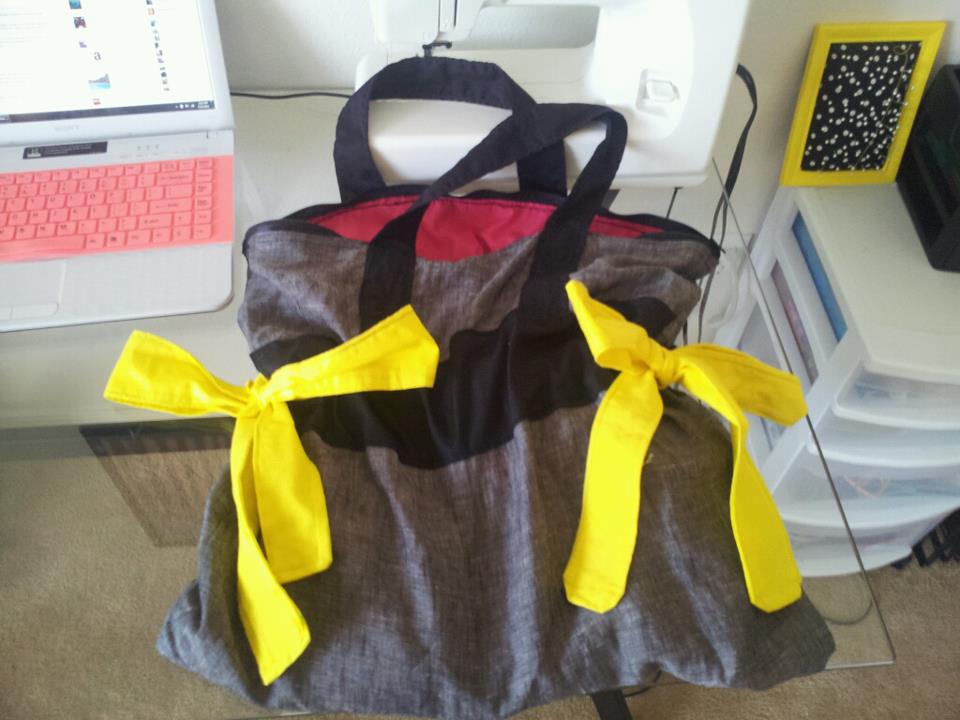
Unfortunately the link was removed from Pinterest 😦
————————————————–
I made this clutch
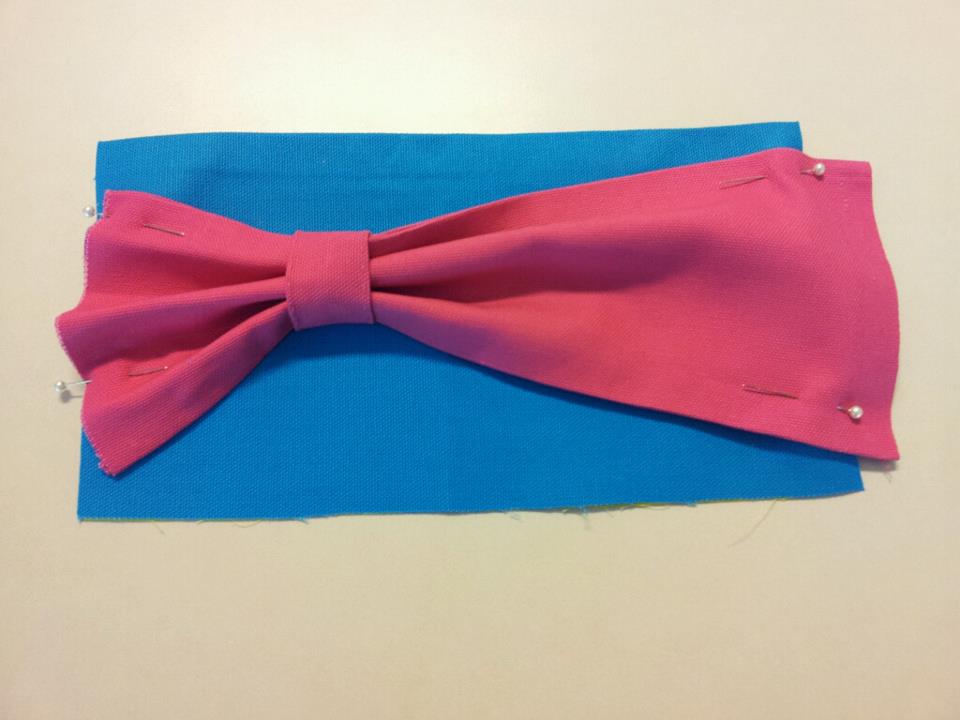

Here’s the tutorial:
http://www.elmstreetlife.com/2012/02/diy-bow-clutch-sewing-tutorial.html#_a5y_p=1081205
————————————————–
I mod-podged over paper to create a cool looking night stand

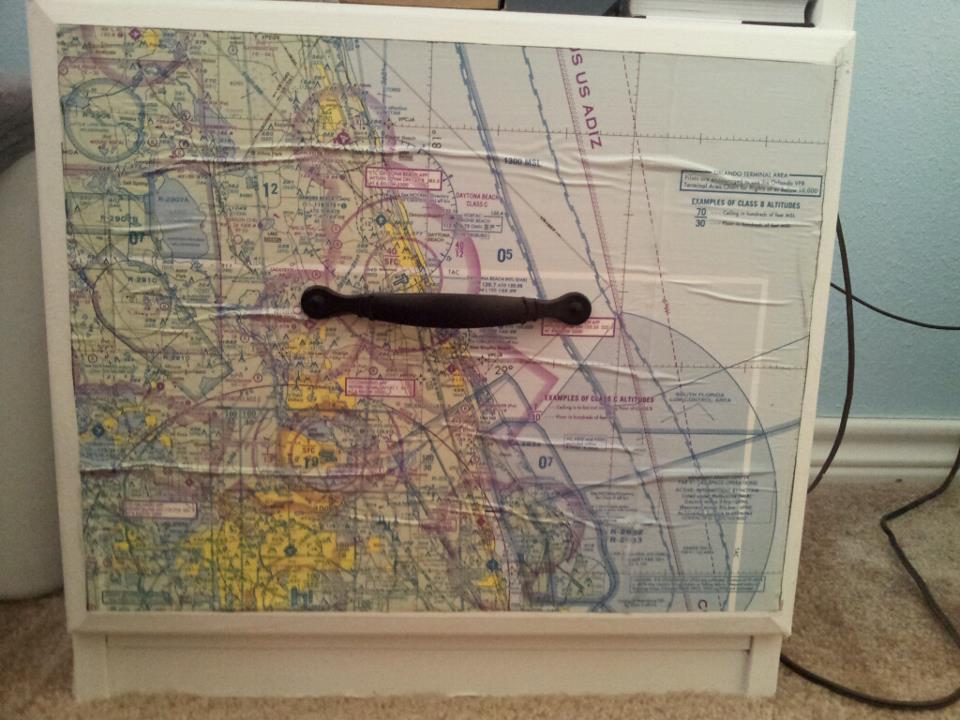
My boyfriend and I are both pilots which explains the use of the sectional charts. My only advice here is to not use too much of the mod-podge because it causes the paper to wrinkle. But I believe it turned out wonderful and kept us from throwing this old nightstand away!!
————————————————–
I crocheted this blanket for my grandmother’s birthday on January 28th.

I made this by making a line of single crochets for as long as you want the blanket then it’s just a double crochet for the rest of the time! I fit hers to a queen bed. It was five rows of blue and two rows of red that repeats for the width of the blanket. I think it turned out well.
————————————————–
This is our new duvet cover that I just made about a week ago.

Duvet Cover. This will depend on the size of your bed but we have a king size down comforter for our queen bed and it measures 93″x103″ so that’s what I made the duvet to fit. Maybe give 1-2″ extra for stitching so that the duvet isn’t cramped in the cover.

http://www.thetaylor-house.com/diy-inexpensive-craft-table-with-storage/


